Reproduction Retro Fabric Lunch/Library Tote Bag


I will be listing this set on Etsy. I lined both with the same red and white fabric.

DIY Primitive Raggedy ann doll Patterns and Handmade dolls. Thrift Store lover.


 My friend Marcie received her handmade pencil swap from me. Yipee! I made her a pencil tote, along with, yes......it does seem familiar right? It's my Library/Lunch Tote Bag from my tutorial. Ok, so I sent more than just pencils. I could not resist the fun little pens I found. I had so much fun doing my pencil swap. Thank you ladies for taking part in the swap. I will post pictures of the other ladies swaps if they share some with me. (hint, hint)

 My friend Amanda was gifted the bag I made. I sent along a Bailey StuFFn of her own and some felt barrettes with vintage buttons. I have been promising her those barrettes for a bit. She is getting ready to have a baby! Best Wishes Amanda! XOXO (my my that blue bolt is getting some use huh?)


 These were a personal order for someone. I can't show any favor cause I made them. LIES! They are so freaking cute. I love them. I am so proud of how they came out. I am just floored with my hands. How do they make such cute faces? The hardest part for me is selling them. I miss my dolls. I give all my dolls hugs and kisses before they leave. And some even dance with me. Sometimes we have a going away tea party. (sometimes they just can't wait to leave me and just hop in the box themselves, brats) I still miss them. Enjoy them MISS Lisa! XOXO
 You know I can't show you what I sent yet. Naughty Naughty, quit peeking! Soon I PROMISE!


 My friend Renae from My Little Raggedy Blessings has gifted me this sweet charming pin poke. My fancy way of saying needle and pin keeper. Its so adorable. In colors I love. My my what a treat for me and my eyes. Thank you so much Renae for thinking about me. She is just such a sweetie. I adore her creations. She makes the cutest annies. You should go take a peek at her Ebay sometime. I promise you she is worth the wait. Girl thank you so much for thinking of me. I adore the little puppy and button. They are going in my keepsake pile. The tin. Oh my word I LOVE that color. There are little odds and ends in there like eyelets and snaps. (yes SPOILED again, I know it XOXO)


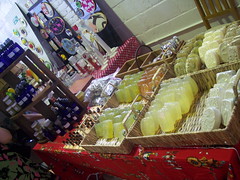
 Oh Looky what I have found today. It was just waiting for me. They have been out of my price range when I find them. But they are not even worth what some were asking for. $60.00-120.00. Some looked to have been left outside for a few years or they don't close properly. Some were just even on the hinges so you opened it up it falls over. This one is perfect. No rips and tears in the inside. Not totally crisp and clean. But I am not looking for that. It has a few knick and knacks here and there but thats ok. The trunk is solid. The hinges, the locks. Everything works great and with ease. Oh and its RED! I am going to use it for display but to keep all my doll shoes and dresses in. I have them in my fabric bin now. Yeah nice place to keep your toys huh? There is no maker on the trunk. The inside is a beige 50's space star print. $24.00 I had to have it.


 I have to get mine out this week. I am ALMOST finished with mine. I didn't tell my partner I have "her". I am naughty. I will post pics of what I sent, promise. Oh that candy is already gone. :P

 I will show you how to make this lunch bag. You can also use this as a library tote.
 First you need to gather your supplies. You will need a good strong thick fabric. I like to use canvas. It comes in many prints and colors. One yard for the tote. One yard for the lining. You can use the same fabric for the inside lining or you can use another color to add contrast. Also gather any bits of scrap fabric and vintage buttons, rick rack or what you choose for embellishment. I used my bird and yoyo circle from my felt bird pattern. If you are unsure on how to make a fabric yoyo please take a moment to visit my tutorial on this here. You will also need small elastic cord.
 Next sew on your side panels to the front panel.
 Then sew on your back panel.
 This is how it should look with all four panels sewn. I then went to my sewing machine and sewn the bottom of this so its closed.
 Here it is sewn shut. Next you just stick your hand inside and give it a little push till it boxes out. It will form triangles on the edges. Sew each side on the triangle part going up and down. Then cut off the triangles. See next photo for example.
 The top red fabric is how your fabric will look before you cut off the triangles.
 After you cut off the triangles and turn the bag right side out, you will have then created the look you see on the bottom in aqua. That is how a box bottom is made.
 You will need to do sew the lining the same way and then insert it into the bag. I then folded the fabric and ironed all the way around the bag. I did this for the lining as well. This helps to even the fabric all the way around the bag. Don't sew just yet. We need to add the straps, button and cord.
 Take the straps and iron them into two parts.
 Then I folded it over again, ironed and then sewn straight down so it would not open. Do the same for both straps.

 You will need to line up your straps and pin them in place. I sewed on a large vintage plastic button in the center of the bag on the front panel. On the back panel I sewed the elastic cord. Make sure you sew them on at this point or you will see your sew marks afterwards. Sew in between the layers. Sew the button and the cord in the middle of the handle placement. You are then ready to sew everything in place. You will not be able to use your sewing machine to close shut the area where we sewed on the large button. You will have to use some needle and thread and just hand sew a straight stitch using small stitches.
Have fun making this. Feel free to make them and sell them and tell them where you got the pattern from. ME! Anniescupboards. Oh and you can gift these as well. I am. I am gifting BOTH of these bags! I hope they like them! XOXO Enjoy!